Learning Goals
At the end of this Tutorial, you will be able to:
- Access an HTML element by its unique id using the JavaScript document.getElementById() method.
- Add JavaScript function handlers to buttons in a web page.
- Modify the CSS properties of an HTML element.
- Modify the content of an HTML element with .innerText and .innerHTML.
- Change and restore the visual appearance of an HTML element with the .classList.add() and .classList.remove() methods.
Download the new workfile on your computer and save it as dom-buttons.html.
About the Document Object Model (DOM)
When a web browser accesses a web page – also known as an HTML document – it performs two operations. It:
- Displays (renders) the web page in the browser, using any links in the page to CSS, image, video, font, and other files.
- Creates a Document Object Model (DOM) of the web page that enables the page's content to be accessed and modified by JavaScript code. In effect, the DOM is an interface between and JavaScript.

Accessing HTML elements by their id
The simplest way to enable JavaScript to access an element in a web page is to give that element a unique id.

You can then use the document.getElementById() method to access the element.
// Access a web page element with by its unique ID
let bigHeading = document.getElementById('bigHeading');Now bigHeading becomes an object in JavaScript representing <h1> element in the webpage. You will learn more about objects in the Working with objects Tutorial.
Note that the document.getElementById() method is case-sensitive.
- If there is more than one element with the same id in the web page (which there should not be!), the above method returns the first element found.
- A null value is returned if no element with the target id exists in the web page.
Modifying an HTML element
Once JavaScript has access to an HTML element, it can then modify the properties and content of that element.
Modifying the properties of an HTML element
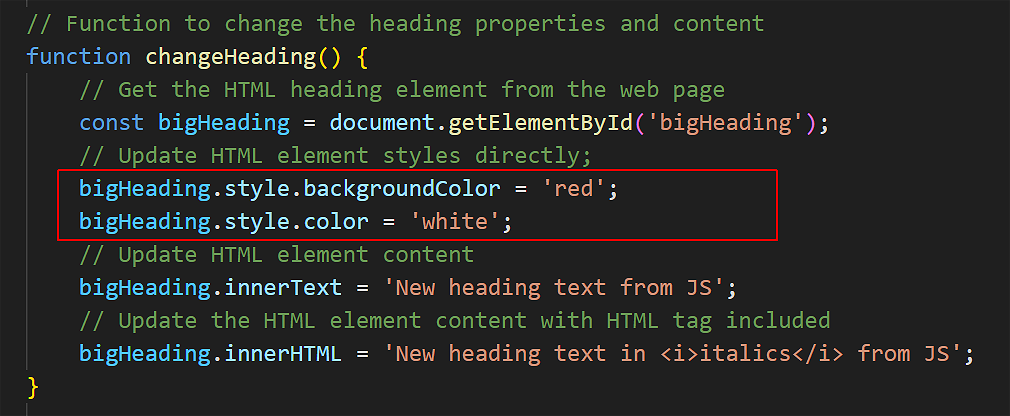
Here are two examples of JavaScript changing an element's properties. You will need to reload the web page to see the result.
// JavaScript can change the properties of an element
bigHeading.style.backgroundColor = 'red'; // NOT background-color
bigHeading.style.color = 'white';Note that because the dash - character is used in JavaScript as the subtraction operator (see Working with numbers), it cannot also be used to represent CSS style properties. For this reason, you need to remove the dashes from CSS styles and capitalise the first letter of each subsequent word (camelCase).
For example, to modify the styles applied to an HTML element with an id of subHeading, you would enter the following:

Modifying the content of an HTML element
JavaScript can also change the content of an element. The following code changes the text content and HTML tags of the <h1> element.
// JavaScript can change the content of an element
bigHeading.innerText = "New heading text from JS";
bigHeading.innerHTML = "New heading text in <i>italics</i> from JS";Again, you will need to reload the web page to see the result in your web browser.
Note the key differences:
innerText |
Updates text content only |
innerHTML |
Can update both HTML tags and content. |
Adding and removing classes for an HTML element
Up to now, you have been changing the visual properties of an HTML element in a web page with code such as the following.

A better option is to create classes in the CSS, and use an event handler to add and remove the CSS classes as required. For example.
- Add the following new CSS class to the <style> block in the <head> of the web page.
.newHeadingClass { background-color: blue; color: pink; padding: 10px; border-radius: 5px } - In the JavaScript code of the web page, update your first function and add a new third function as shown below.
// Add CSS class to the heading // Function to change the heading properties and content function changeHeading() { // Get the HTML heading element from the web page let bigHeading = document.getElementById('bigHeading'); // Add a new CSS class to the element bigHeading.classList.add('newHeadingClass'); // Update HTML element content bigHeading.innerText = 'New heading text from JS'; // Update the HTML element content with HTML tag included bigHeading.innerHTML = 'New heading text in <i>italics</i> from JS'; } // Function to restore the heading to its original state function restoreHeading() { // Get the HTML heading element from the web page let bigHeading = document.getElementById('bigHeading'); // Remove the CSS class from the element bigHeading.classList.remove('newHeadingClass'); // Replace the new HTML element content with the original content bigHeading.innerText = 'Big heading here'; } - In the HTML of the web page, add an onclick event handler with the restoreHeading function to the second button.
<button id="btn_2" onclick="restoreHeading()">Restore h1</button>
Reload your web page and verify the first and second buttons work correctly.
Adding a new HTML element to a web page
JavaScript can also add new HTML elements to a web page. This is a two-step process:
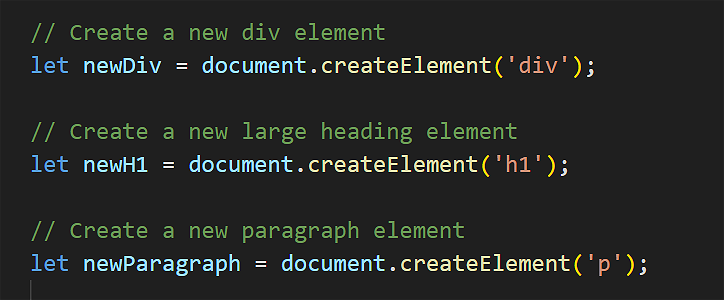
- You use the .createElement() method to create the HTML element in the JavaScript code and to specify what type of element you want to create. See the examples below.
 At this stage, the new element exists only in JavaScript. It has not been added to the HTML of the web page yet.
Typically, you would now add some styles and content to the new element in the JavaScript code, and maybe an id too. For example.

- Next, you use the .appendChild() method to add your new element to the HTML of the web page. Only then does it become visible to the user.
 You need to specify where to put your new element on the web page. In other words, the parent element that your new element will belong to. JavaScript adds your new element as the last child of the parent.
In the simplest case, you would append your new element to the web page as a whole, the document.body.
Let's work through a complete example of creating a new HTML element in JavaScript and adding it to a web page.
- Add the following new CSS class to the <style> block in the <head> of the workfile.
.messageOrderPlaced { background-color: lightgreen; color: #000; border: solid 1px green; padding: 10px; border-radius: 5px } - In the HTML of workfile, add a fourth button after the other three already present.
<button id="btn_4" onclick="placeOrder()">Order product</button> - In the JavaScript part of the workfile, add the following function.
// Function to add a new message to the page function placeOrder() { // Create a new HTML element let newMessage = document.createElement("div"); // Add a CSS class to the new element newMessage.classList.add("messageOrderPlaced"); // Add content to the new element newMessage.innerHTML = "Your order has been placed. <b>Thank you</b>"; // Add the new element to the web page document.body.appendChild(newMessage); }
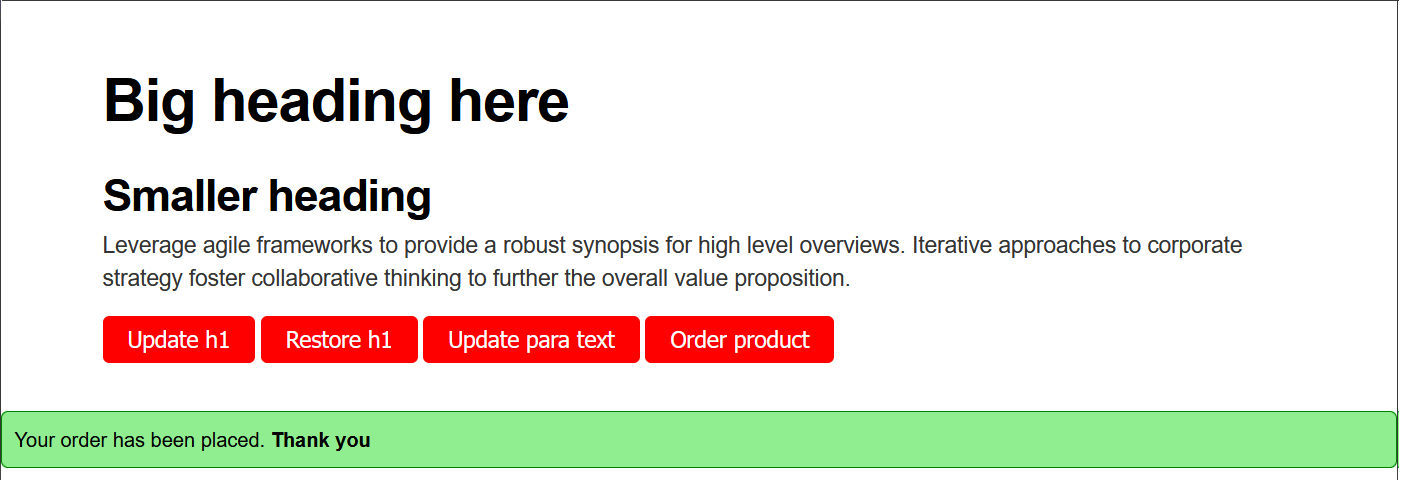
As you can see, your new element is now added to the bottom of the web page.

If you reload the web page, the new element is removed. The element will only exist after JavaScript has created it in response to the user action of clicking a button.
About the DOM and HTML parents and children
You can think of the Document Object Model (DOM) as like a family tree:
- A parent element contains other elements
- Elements inside a parent are called children
- Elements at the same level are called siblings
Here is a simple example:

Every HTML element on a web page is ultimately a child of the web page itself, represented in JavaScipt by the document.body object.
Let's update the previous example to add the new HTML element as a child of the <section> element, instead of the web page as a whole.
- Add a unique id to the <section> element of the HTML part of the workfile as shown below.

- In the JavaScript code, update the placeOrder() function as shown below.
// Function to add a new message to section element in the page function placeOrder() { // Create a new HTML element let newMessage = document.createElement("div"); // Add a CSS class to the new element newMessage.classList.add("messageOrderPlaced"); // Add content with HTML tag to the new element newMessage.innerHTML = "Your order has been placed. <b>Thank you</b>."; // Get the section element as the parent element let parentSection = document.getElementById("mySection"); // Add the new element as a child of the parent section parentSection.appendChild(newMessage); }
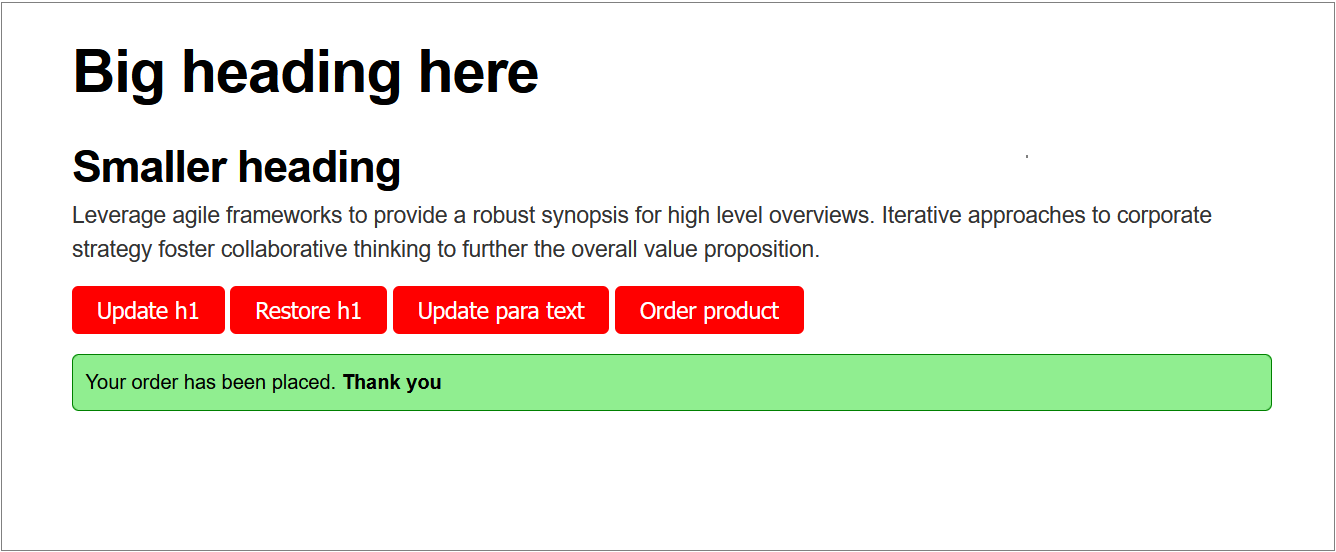
Reload your web page, click the fourth button, and verify the new element is added correctly.

Try it yourself
In your workfile...
---
Add a <div> with a unique id and some sample text.
Add two buttons labeled "Turn Red" and "Reset Color."
When "Turn Red" is clicked, change the background color of the <div> to red.
When "Reset Color" is clicked, restore the original background color.
---
Create a button labeled "Add Paragraph."
When the button is clicked, use JavaScript to create a new <p> element with the text "This is a new paragraph!" and append it to the page.
---
Create a button labeled "Add Bold Text."
Create a <p> element with the initial text "This is some text."
When the button is clicked, update the paragraph to include the text "This is some <b>bold</b> text."
More learning resources
Tutorial Quiz
Tutorial Podcast
Sample AI prompts
Can you explain the difference between innerText and innerHTML when modifying content in JavaScript? Please provide practical examples showing when to use each one.Walk me through creating a new HTML element with JavaScript, adding some styles and content, and appending it to a specific section of a web page. Why do we need to use appendChild()?
        What's the difference between these two approaches to styling elements with JavaScript? Which is best practice and why?

        - Directly setting element.style properties.

        - Adding/removing CSS classes with the .classList.add() and .classList.remove() methods.
 We want this code to run after the user has clicked a button, not immediately after the web page loads.