
At the end of this Tutorial, you will be able to:
- Create and style a responsive email sign-up form for capturing user email addresses.
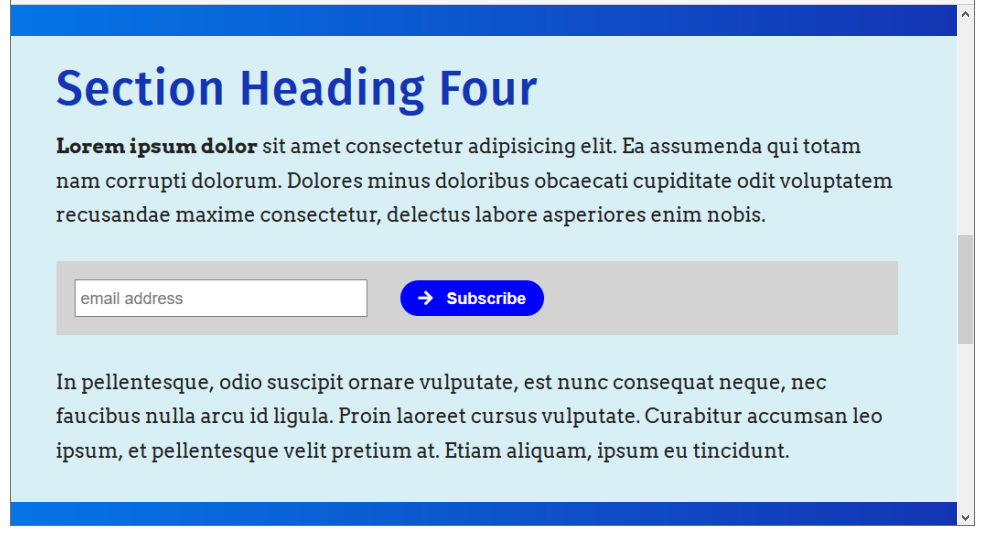
You can view the finished version of the sample web page you will create in this Tutorial by clicking the image below. The finished sample will open in a new tab of your web browser.
About HTML forms and GitHub Pages
What are called forms in HTML enable users to submit information to websites for processing. A typical example of a form is shown below.
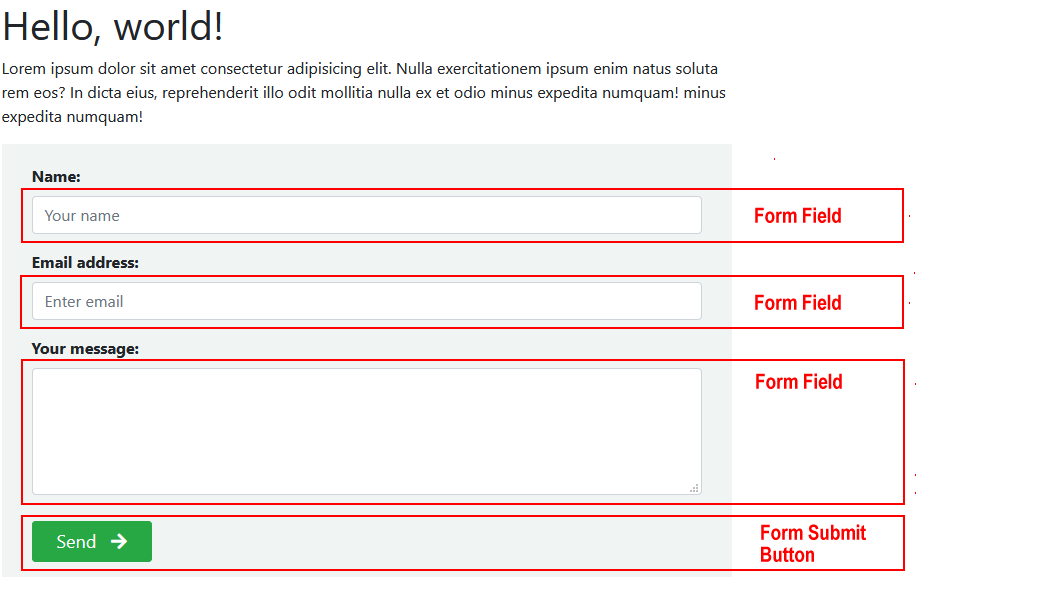
It includes three entry areas or form fields into which a user can input information: Your Name, Your Email and Your Message.
At the bottom of the form is a submit button named Send. When clicked or tapped, this button submits the information entered in the form fields to the website.
Your web hosting account on GitHub cannot run the type of server-side program that is needed to process information entered by users into HTML forms.
As a result, you need to use an external online service to collect the information entered to an HTML form by users of your website. See the next Tutorial: Serverless Forms.
Creating your sample files
In this Tutorial, you will update a copy of a sample web page and stylesheet you created in the Buttons and Icons Tutorial.
- In VS Code, open the buttons-icons.html web page in your 📁 websites/exercises sub-folder and save it with this new name: forms.html
- Open the buttons-icons.css stylesheet in your 📁 websites/exercises/assets/css sub-folder and save it with this new name: forms.css
- In the new forms.html file, rename the linked stylesheet from buttons-icons.css to forms.css and save the web page.
- Finally, in the web forms.html page, replace the current title and description details with the following:
<title>Sample web page with an email sign up form</title>
<meta name="description" content="A sample web page with a form for capturing an user's email address.">
Adding an email sign-up form to your web page
Follow these steps to add a simple form to your web page that enables users to enter and submit their email address.
- In VS Code, scroll to between the two text paragraphs in the fourth section block.
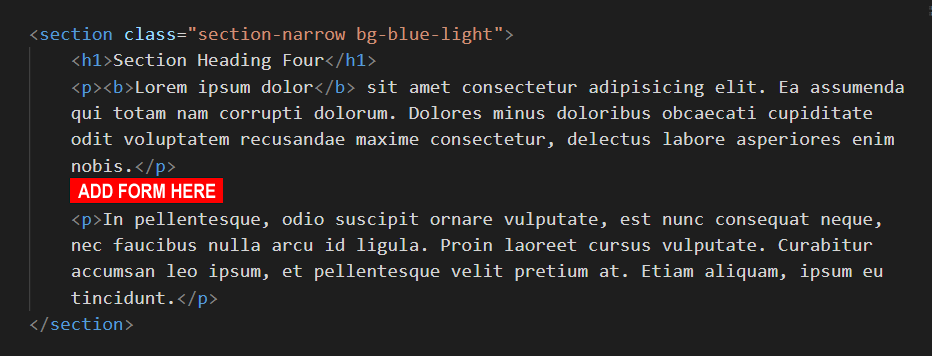 This has a h2 sub-heading named “Section Heading Four” and a light-coloured background.
Press the Enter key a few times to open up some empty lines.
This has a h2 sub-heading named “Section Heading Four” and a light-coloured background.
Press the Enter key a few times to open up some empty lines. - To this space, copy-and-paste the following three <p> paragraph tags, each one containing a sample hyperlink.
<div class="container-form">
  <form action="#" method="POST" id="email-form">
     <label for=""></label>
     <input type="email" id="email" name="email" placeholder="email address">
     <button type="submit" class="btn btn-solid btn-rounded"><i class="fas fa-arrow-right"></i> Subscribe</button>
   </form>
</div>
- When finished, save the forms.html web page.
Creating form button styles
When you display your forms.html sample page, you can see that the button, which is styled with the btn-solid class, is not displaying properly.

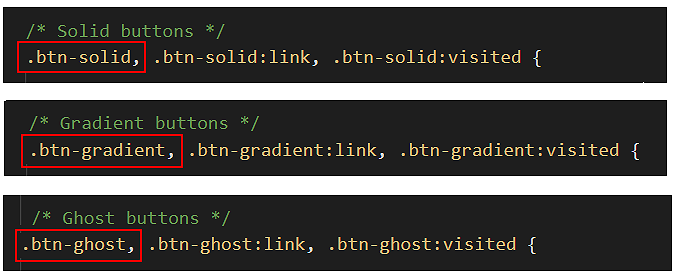
This is because all the button classes in the forms.css stylesheet apply only to a hyperlink elements. To extend these classes to button elements, edit the button classes in the stylesheet as shown below.
When you save the stylesheet, and reload the web page in your browser, the form button now displays correctly as shown below.

That’s it. You have now successfully added spacing to icons within your button-styled hyperlinks.
Click forms.html to view a finished sample of this web page in a new tab of your web browser.
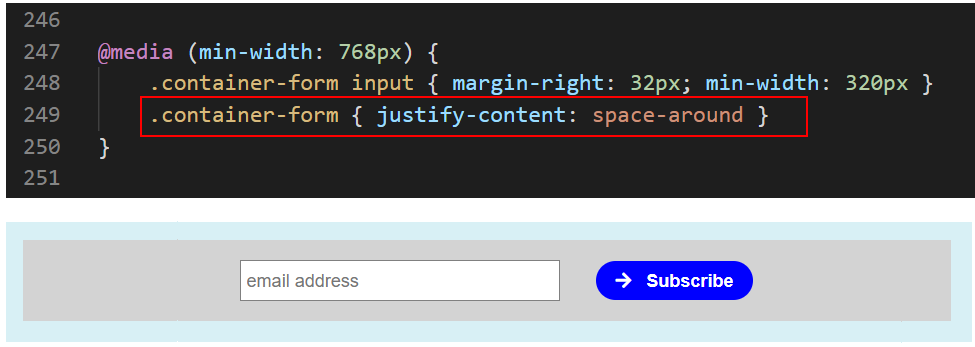
To centre-align the form on non-mobiles, uncomment the CSS line style rule below.
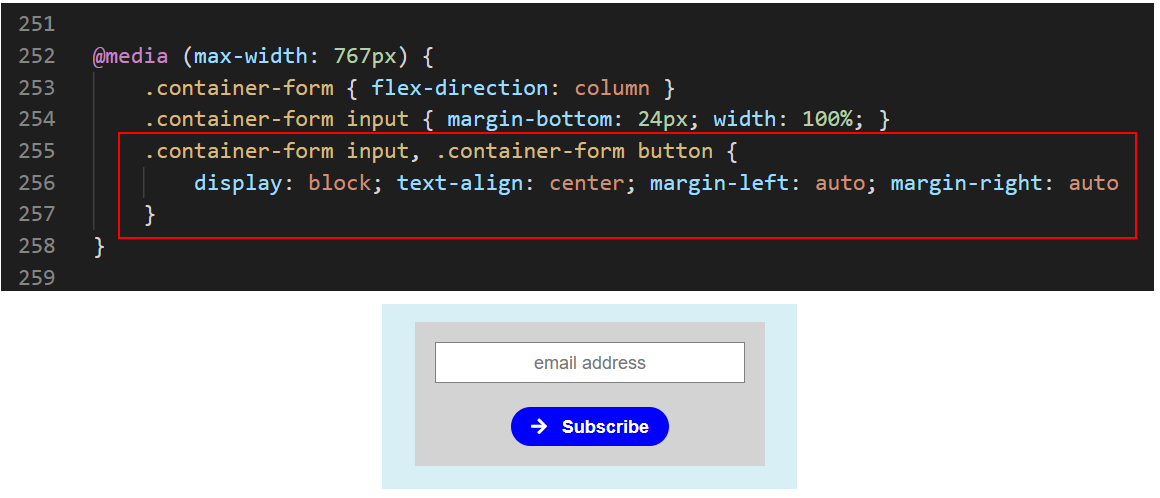
To centre-align the form on mobiles, uncomment the CSS line style rule below.
Updating your website home page
Now that you have updated and styled a new web page, let’s add a hyperlink to it on the ‘home page’ of your web site. Follow the steps below:
- In VS Code, open this HTML file in your ‘main’ websites folder: index.html
- Copy-and-paste the following new line to your web page at end of the current list of web pages.
<p><a href="exercises/forms.html">Email Sign-up Form</a></p>
Save your index.html web page and view the result in your browser.
Uploading your files to GitHub
After finishing your web page and stylesheet, you are now ready to upload them to your account on GitHub.
- Open a new tab in your web browser and go to GitHub.com. If you are not already signed in to your GitHub account, sign in now.

- On your GitHub home page, click the ‘repo’ that holds your web pages. Its name will look as follows, where username is your chosen username on GitHub.
username.github.io

- On the next GitHub screen displayed, near the right of the screen, you can see a button named Add file. Click on it.

- From the dropdown list displayed, choose the option Upload files.

- In File Explorer (Windows 10) or Finder (Apple Mac), drag-and-drop your index.html file and your 📁 exercises sub-folder to upload them to your repository on GitHub.

- Scroll down to the bottom of the GitHub screen, and accept or edit the short message (Add files via upload) in the Commit changes box.
- Finally, click the green Commit changes button to upload your files.

Your updated home page and sample web page are now published on GitHub at web addresses similar to the following:
https://username.github.io/index.html
https://username.github.io/exercises/forms.html
It may take a few minutes for your uploaded files to appear on GitHub.