Learning Goals
At the end of this Tutorial, you will be able to:
- Understand the differences between a wireframe and a prototype, as those terms are used in front-end design.
- List and describe the main container (semantic) tags used in modern web design (HTML5 and CSS3).
Wireframes and prototypes
Creating wireframes and prototypes are typically the first two steps in developing a user interface for a web project. Their purpose is to establish a web page’s basic layout and content before working with HTML and CSS code.
About wireframes
Wireframes are simply rough sketches of a web page, often drawn by hand. They are said to be low-fidelity.
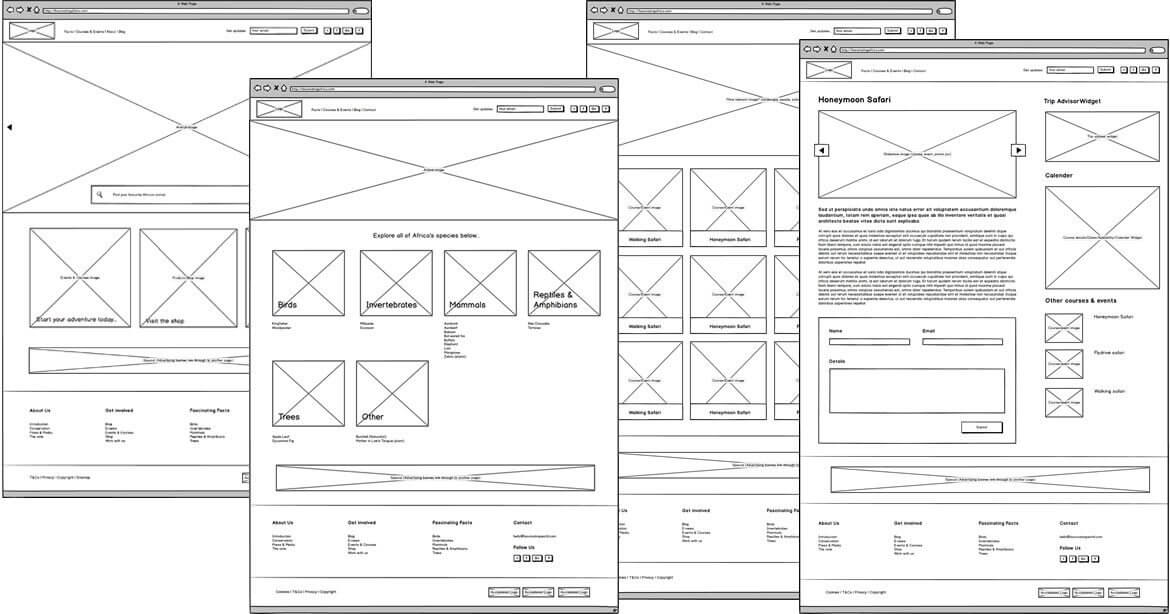
A number of software products exist to support the creation and sharing of wireframes. One such as BalsamicIQ.
About prototypes
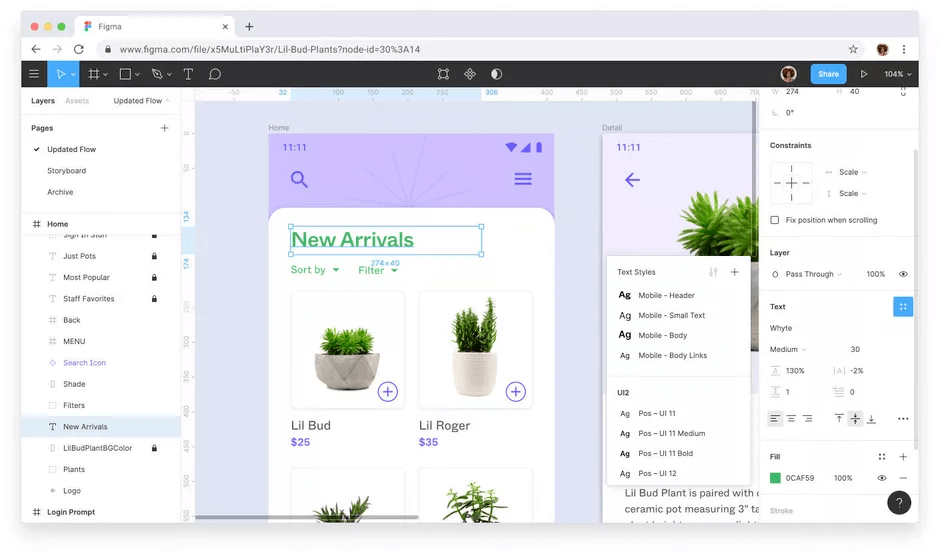
In contrast, a prototype is a high-fidelity mockup of a web page. Typically, it contains various assets such as images and videos, final text, and ‘clickable’ interactive elements such as buttons and forms.
A popular software product for prototyping web pages and other user interfaces is Figma.
Web page layout with container tags
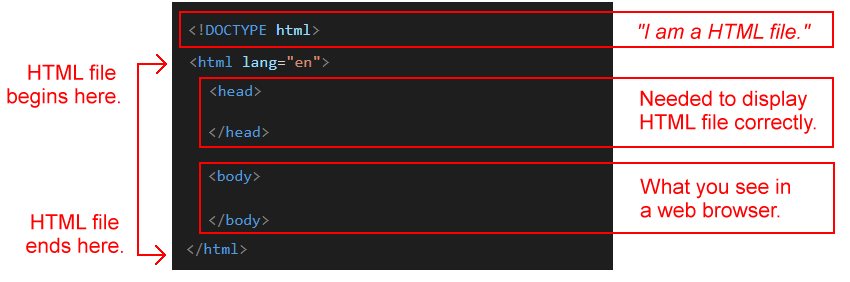
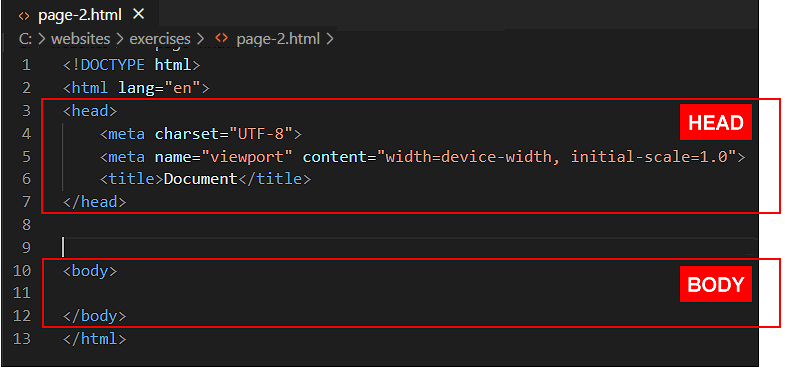
In the Working with HTML Tutorial, you learnt that the simplest possible HTML file has two main parts – the <head> and <body> – and looks as shown below.
Modern web design (HTML5 and CSS3) uses a number of so-called container tags for the content within the <body> of a web page.
- Unlike tags such as <h1>, <h2> and <p>, container tags have no default CSS styles. For example, they do not change the size, appearance orspace around text or images.
- The purpose of container tags is not to style web page content but to structure or organise it into ‘blocks’ or ‘chunks’.
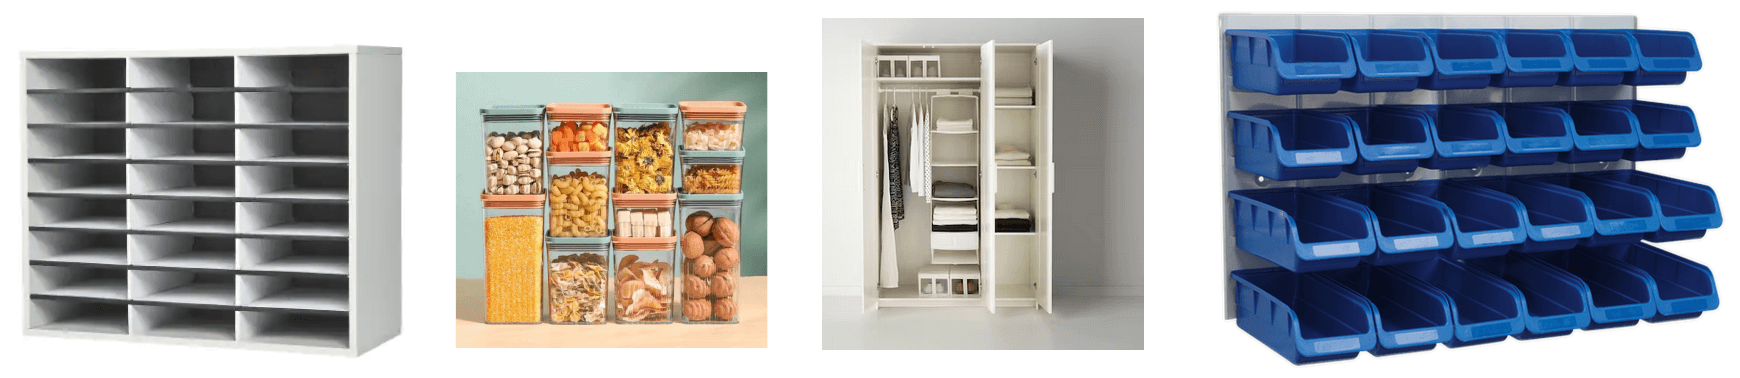
Container tags in a web page play the same role as containers or organisers for documents, food items, clothes, and other physical objects in the real world.
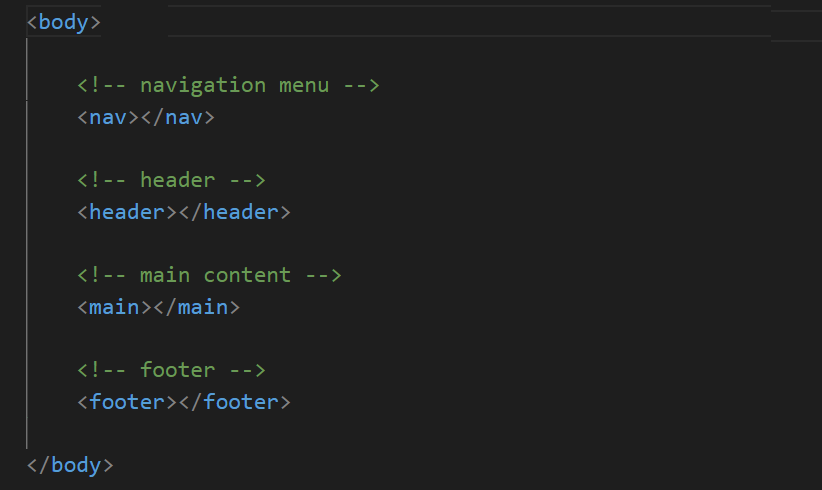
The four major container tags are listed below.
- <nav>
- <header>
- <main>
- <footer>
All four tags are placed within the <body> ... </body> of a web page.
You will sometimes see container tags in HTML referred to as semantic tags.
Let’s look at these four container tags in more detail.
The <nav> tag
This tag name is short for navigation. It is most commonly located at the top of a web page where it contains a menu of hyperlinks and the organisation’s logo.
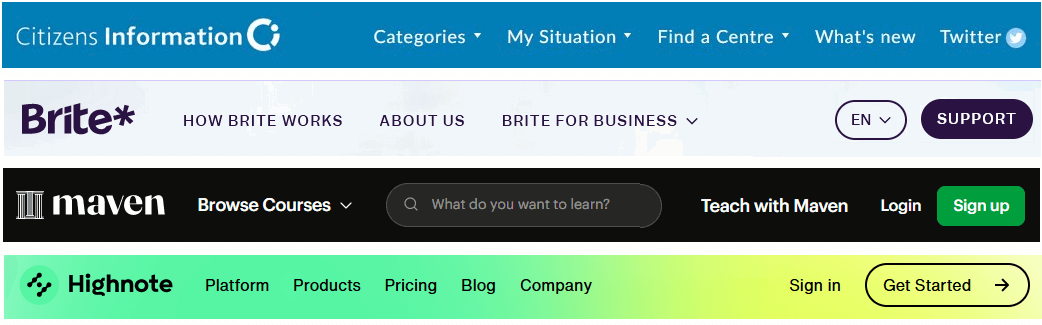
Visual designers refer to this list of menu hyperlinks as the navbar.
The <header> tag
This is generally positioned under the <nav> element at the top of a web page, and usually contains the <h1> heading and some introductory text.

Visual designers refer to this part of a web page as the hero block.
The <main> tag
As its name suggests, this holds the primary content of a web page. In simple terms, this means any content is that should not be in the <nav>, <header> or <footer> containers.
The <footer> tag
Located at the bottom of a web page, this contains such content as the organisation’s details, links to related web pages, and legal and copyright information.

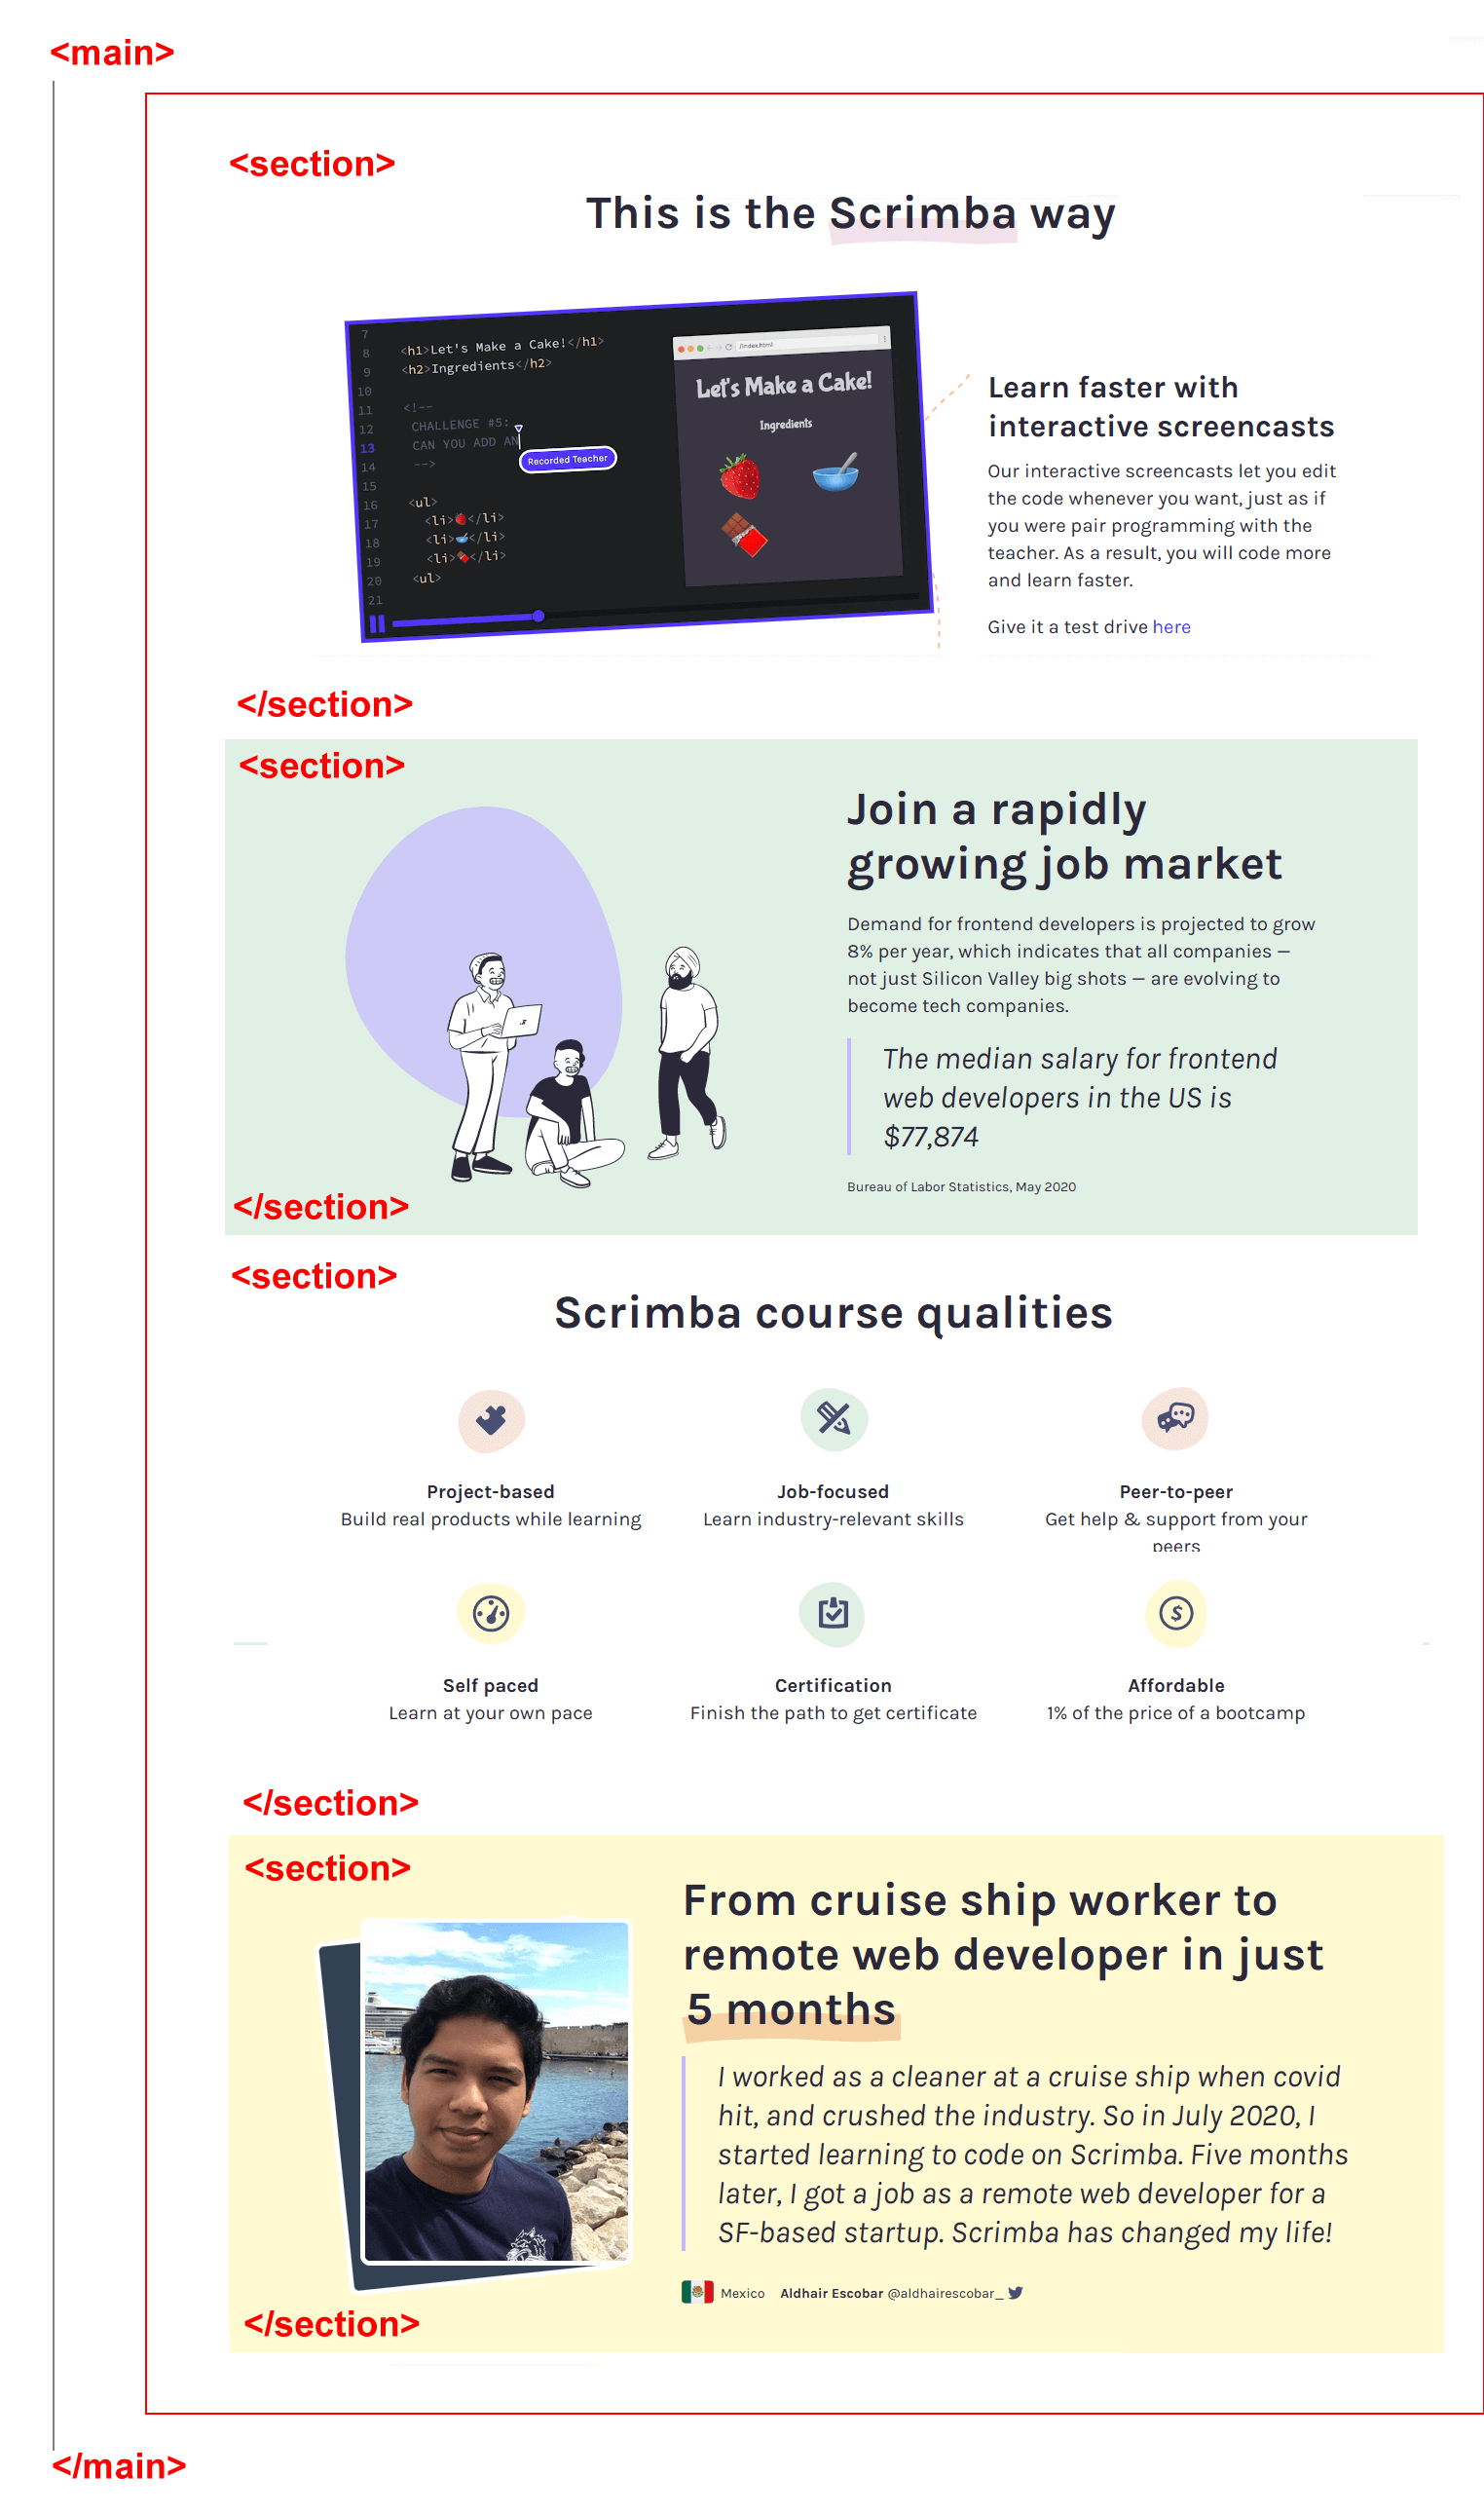
About <section> tags and the <main> tag
In modern web pages, a number of different layouts are often applied to the content within the <main> container. In other words, different parts of the <main> content will look very different from one another.
For example, they may have different background colours and different numbers of columns.
This is achieved by sub-dividing the <main> container with another container tag named <section>.
In the web page outline <body> below, you can see that the <main> container is further subdivided into four smaller <section> containers.

Each of the four <section> containers can now have different CSS styles applied to it. See the example below.
Creating your second sample web page
You will now create a second web page. This will have one <main> tag and six <section> tags.
- In VS Code, choose the File | New Text File command.

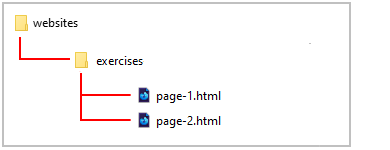
- Choose the File | Save As... command, and save your file in the 📁 exercises sub-folder of your 📁 websites folder with this name:
page-2.html
Your 📁 exercises sub-folder now contains two HTML files as shown below.
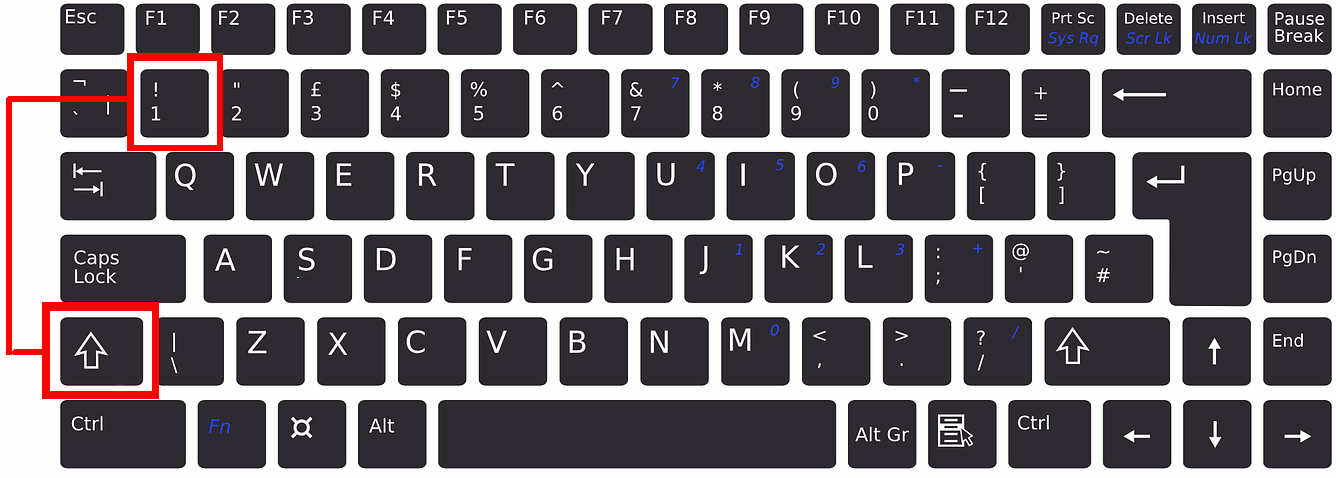
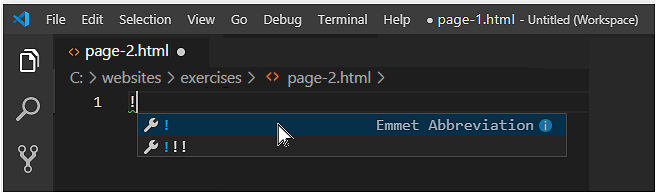
- In VS Code, click anywhere in your empty web page and type the exclamation mark ! (Shift key and number 1 key).
 After one or a few seconds, the Emmet Abbreviation menu appears. Click on the first option from the menu. Or press either the Tab or Enter key.
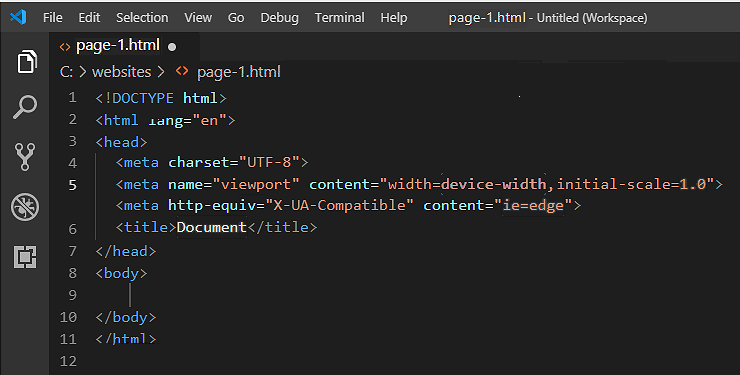
 VS Code now fills your new file with the basic HTML structure.
- To make your web page easier to read and edit, add some blank lines after the closing </head> tag and before the opening <body> tag.
Click just before the <body> tag and press the Enter key one, two or three times.
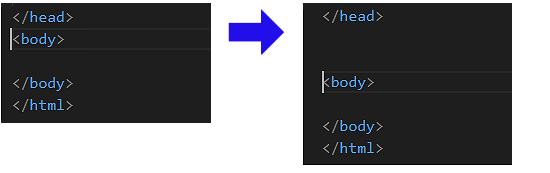 When you look at the HTML of your web page on the VS Code screen, you can now see visually ‘at a glance‘ where the <head> ends and the <body> begins.
- Update the <head> of your new web page by copying-and-pasting the following details.
<title>Sample web page with sections</title>
<meta name="description" content="A sample web page with multiple sections.">
The <head> of your web page should now look as shown below.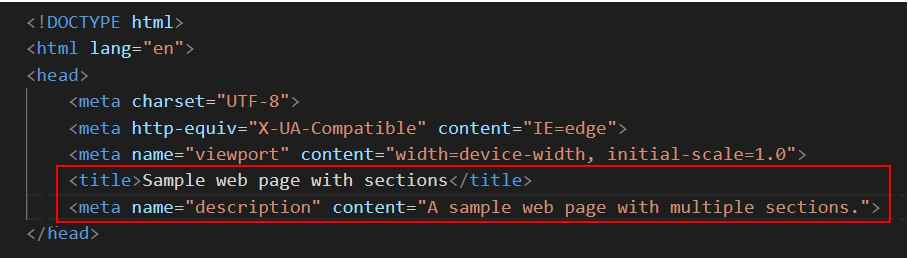
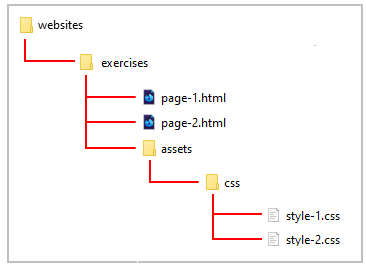
- In VS Code, open the style-1.css stylesheet file, and save it with the new name of style-2.css.
Your 📁 exercises/assets/css sub-folder now contains two CSS files as shown below.

DO NOT type the name of the stylesheet file with an upper-case ‘S’ as in Style-2.css.
DO NOT use some other mixture of upper and lower-case letters, such as STYLE-2.CSS or style-2.CSS or whatever.
DO NOT enter any blank spaces in the name of your file such as style- 2.css or style -2.css.
- In VS Code, return to the page-2.html file.
After the description line in the <head> tag, click with the mouse, and press the Enter key to open a new, blank line.

- Click at the beginning of this new line, press the lower-case letter l key to display a pop-up menu.
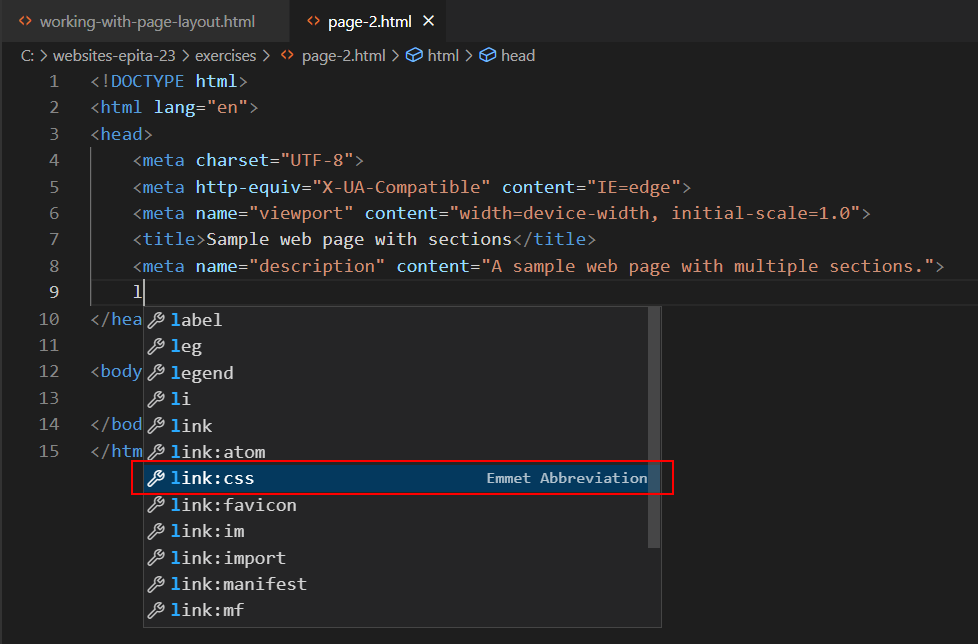
- Click the link:css option with the mouse, or press either the Enter or Tab key to select it.
VS Code adds the stylesheet link code to your web page.
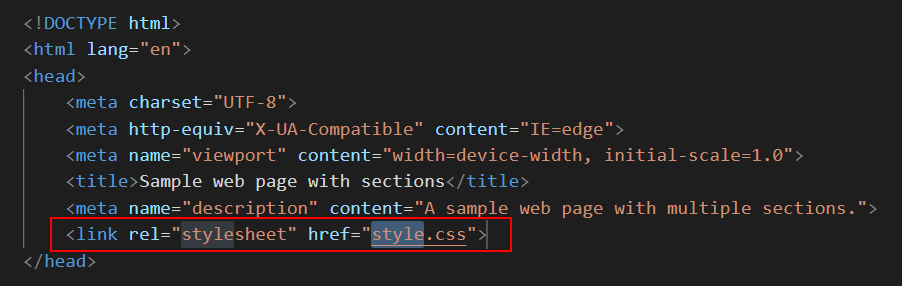
- As you can see, VS Code gives the default name of style.css to the linked stylesheet file.
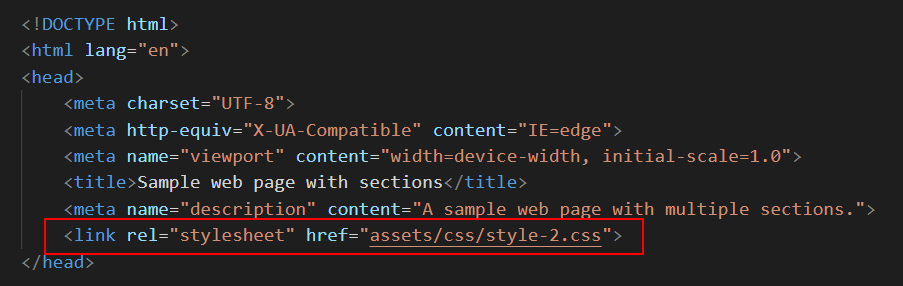
Edit the folder location and file name to:
assets/css/style-2.css
The <head> section of your web page should now look as shown below.
- When finished, save your page-2.html file.
Adding <main> and <section> tags
Your next task is to add container tags, formatting tags and text content to your page-2.html web page.
- In the page-2.html file, after the opening <body> tag, copy-and-paste the following container tags:
<main>
   <section>
      <h2>Nice section heading</h2>

      <p></p>

      <p></p>

   </section>
</main>
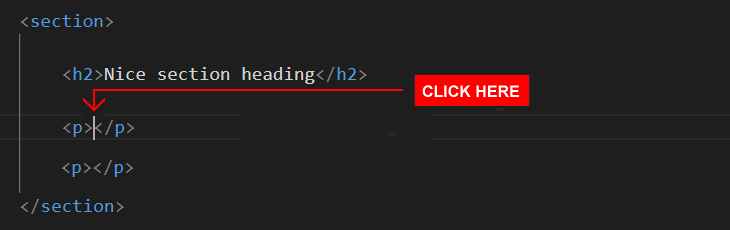
- Click inside the first pair of empty <p> ... </p> tags.
- Type the letters lo
- When the Emmet Abbreviation menu appears after one or two seconds, click on it or press either the Tabr or Enter key.
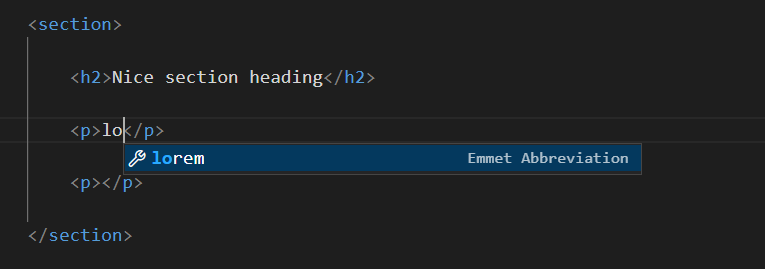 VS Code now creates 30 words of Lorem Ipsum placeholder text.
Note that you can change the number of words of Lorem Ipsum that are generated by typing a number after the word “lorem". For example:
lorem40 or lorem12
VS Code now creates 30 words of Lorem Ipsum placeholder text.
Note that you can change the number of words of Lorem Ipsum that are generated by typing a number after the word “lorem". For example:
lorem40 or lorem12 - Repeat this step for the second empty paragraph.
- Select the <section> block, and copy it five times down the page. You should now have six <section> blocks of content in your web page.
- At the end of the web page, after the final closing </section> tag and before the closing </main> tag, copy-and-paste the following line.
<p><a href="../index.html">Back to Home page</a></p>
The bottom of your web page should now look as shown below.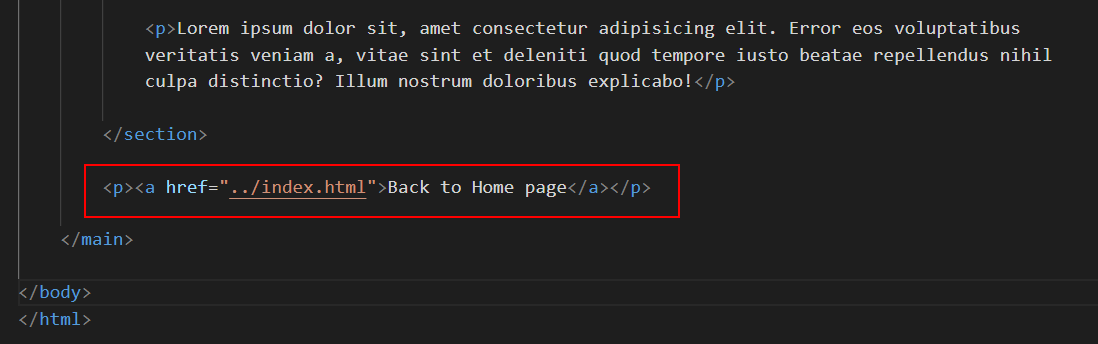
- When finished,save your page-2.html web page file.
- Open your home index.html web page, copy-and-paste the following hyperlink, and save the file:
<p><a href="exercises/page-2.html">Web page with sections</a></p>
✅ You have now finished working with your second sample web page.
Adding negative spacing to the <section> containers
In the style-2.css stylesheet, you can see that the CSS padding property is used to add so-called negative space around the entire <body> of the web page.
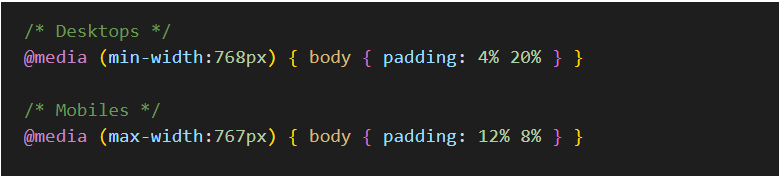
The visual effect on desktop/laptop and mobile screens will be as shown below.

This is fine for very basic web page layouts. However, in modern web design you will not want all the container elements to have the same negative spacing.
In other words, you may want the <nav>, <header>, <section> and <footer> elements to have different amounts of spacing around them.
For this reason, make the following changes to your style-2.css file.
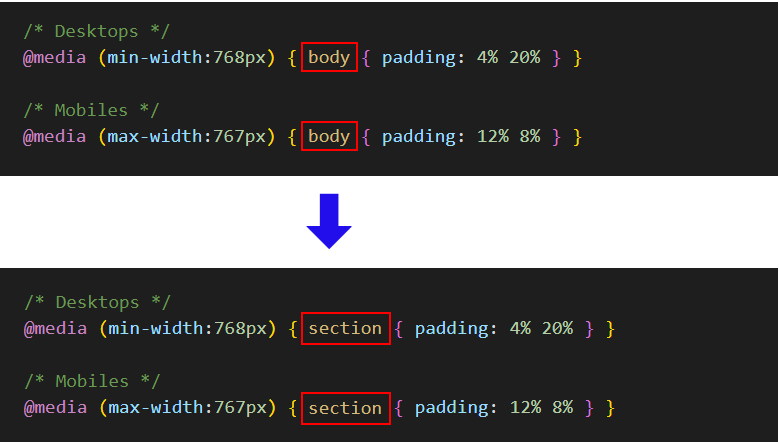
The negative spacing will now be placed around each individual <section> container instead of around the <body> of the whole web page.
Uploading your files to GitHub
Your final task is to upload your web pages and stylesheets to your account on GitHub.
- Open a new tab in your web browser and go to GitHub.com. If you are not already signed in to your GitHub account, sign in now.

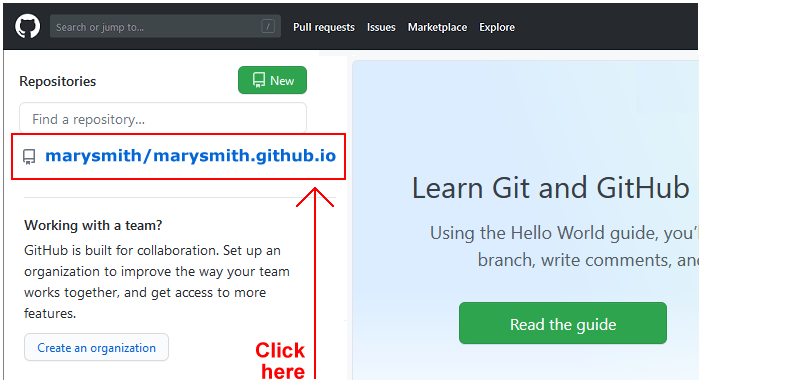
- On your GitHub home page, click the name of the repository (‘repo’) that holds your web pages. Its name will look as follows, where username is your chosen username on GitHub.
username.github.io
- On the next GitHub screen displayed, near the right of the screen, you can see a button named Add file. Click on it.
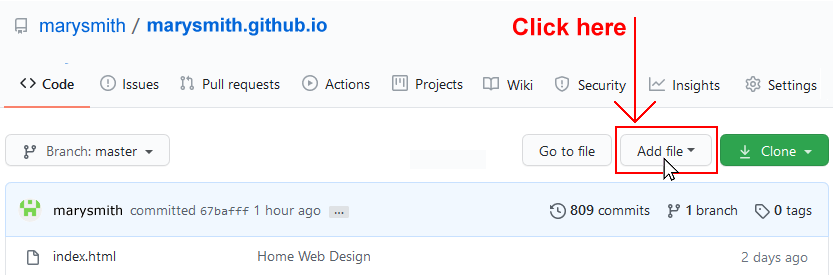
- From the dropdown list displayed, choose the option Upload files.

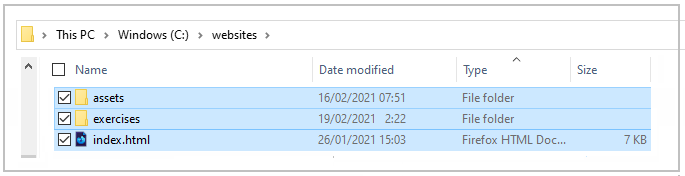
- In File Explorer (Windows) or Finder (Apple Mac), drag-and-drop your index.html file and your 📁 assets and 📁 exercises sub-folders to upload them to your repository on GitHub.
- Scroll down to the bottom of the GitHub screen, and accept or edit the short message (Add files via upload) in the Commit changes box.
- Finally, click the green Commit changes button to upload your entire exercises sub-folder and all the files it contains.
Your web pages are now published on GitHub at web addresses similar to the following, where username is the username you have chosen for your GitHub account:
https://username.github.io/index.html
– or simply –
https://username.github.io
https://username.github.io/exercises/page-1.html
https://username.github.io/exercises/page-2.html
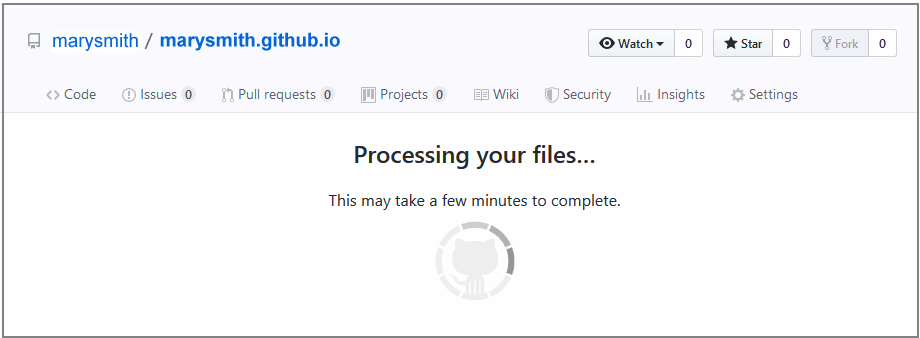
It may take a few minutes for your uploaded files to appear on GitHub.